A Step-by-Step Guide to Connect an eDART System to a PC for RJG® System Utilities Software
Applies to: eDART®, Version 9, Version 10, eDART® System Utilities
Required: PC with Ethernet Port or adapter, Crossover Cable, Administrative Privileges to Change PC Ethernet Properties
Warnings: Please follow your company’s IT Administrative Security Protocols when making changes to a PC’s Ethernet Adapter’s settings.
Description: This guide is to show how to connect an eDART system to a PC where a user would utilize RJG System Utilities Software or apply updates to an eDART System directly. This will pertain to the RJG® Data Extractor, RJG® “Analyzer Tool,” and “eDART® Locator” Tool, eDART System update installer’s.
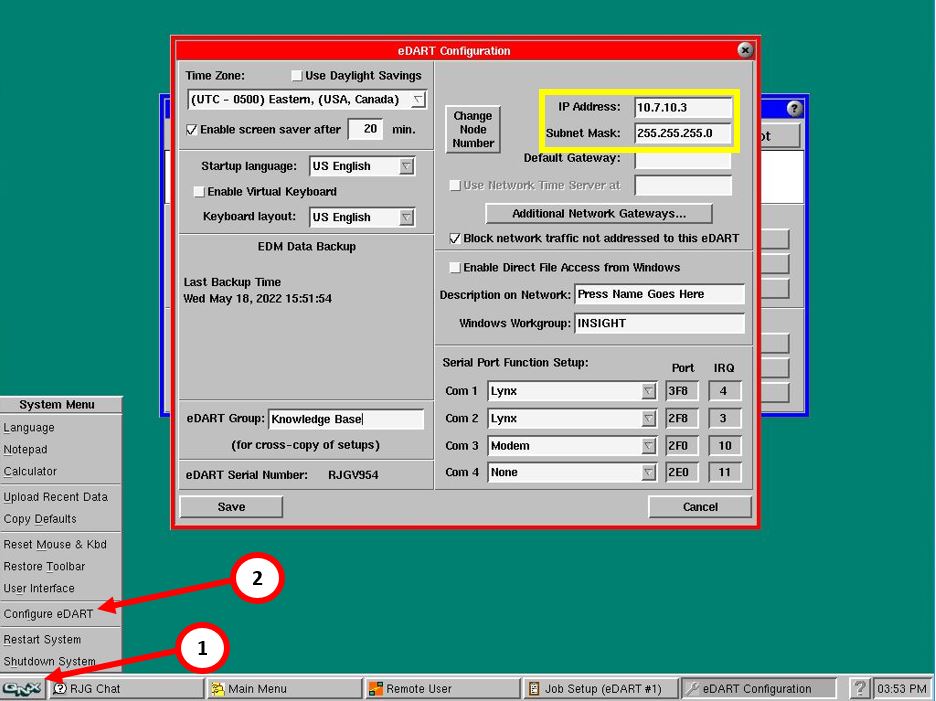
- For version 9.X.X eDART System’s, retrieve the eDART System’s IP Address and Subnet mask before attempting next steps. On the eDART System’s screen, select the QNX button near the lower left-hand corner, select “Configure eDART.”
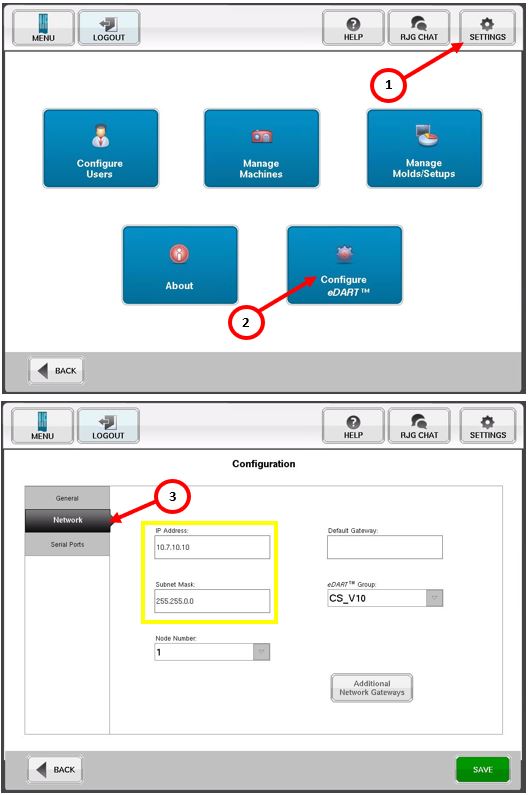
- For version 10.X.X eDART Systems, retrieve the IP Address and Subnet Mask by selecting the Settings button near the top right of the eDART System’s screen. Select the “Configure eDART” button, then select the Network tab.
- Plug a crossover cable from a PC to the eDART System’s Ethernet port.
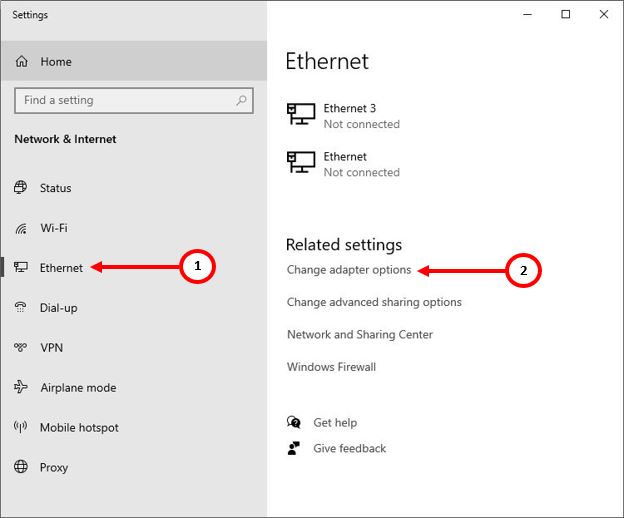
- For Window’s Users, navigate to the PC’s settings, and select the “Ethernet” option to open the Ethernet Settings. Select “Change adapter options.”
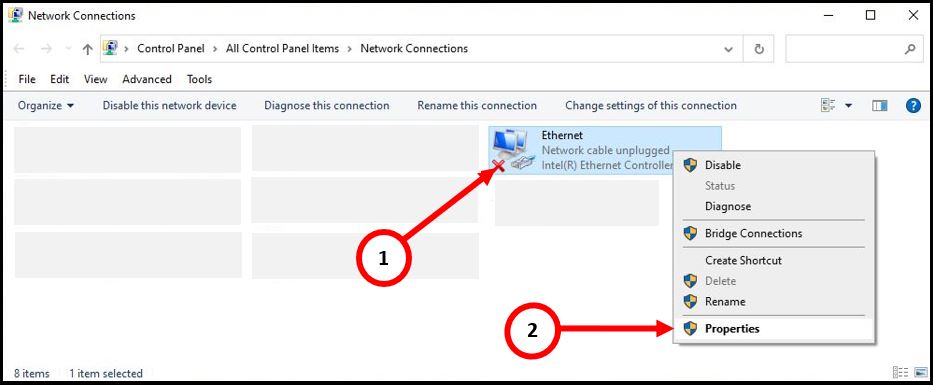
- Select and Right Click on the Ethernet Adapter that the cross over cable is connected to and select Properties
- In the Ethernet Properties Window, Select the option “Internet Protocol Version 4 (TCP/IPv4) to highlight, then select the Properties button.
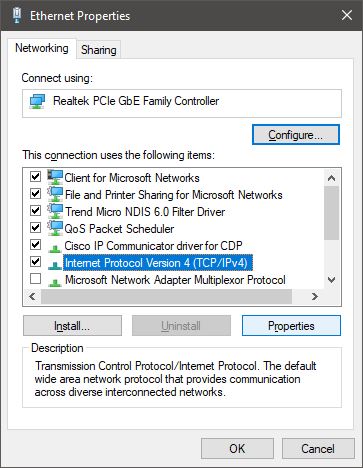
- In the Internet Protocol Version 4 (TCP/IPv4) Properties window, select the “Use the following IP address” button.

- Type an IP Address that has the same first three sets of numbers. Then the last set will be a different number to allow both the PC’s NIC’s IP Address and eDART Systems IP Address to communicate properly
- For example, if the eDART systems IP is 10.7.10.10, you will want to assign the PC’s Ethernet’s IPv4 IP Address to 10.7.10.15.
- Type in the same Subnet Mask as the eDART Systems Subnet Mask and select “ok” on the PC’s Ethernet Properties Window.
- The PC should now be successfully configured and connected to the eDART System. This should now allow the eDART system to be seen by the RJG System Utility applications such as eDART Locator, eDART Data Extractor, eDART Update Installers, etc.
RJG Technical Support
800-472-0566
support@rjginc.com